How to Sew a Simple Head Scarf
Keeping long hair clean during barn chores on the homestead can be difficult. That is, unless you cover it. A cotton head scarf is a great way to cover your hair without extra warmth for spring and summer barn chores. They are simple to make, and you only need one yard of fabric. Actually, you can get away with 3/4 of a yard if your fabric is pre-squared. But you can lose many inches in the squaring process described in step two, so it is best to start with one yard.

This project should take 1 to 1 1/2 hours to complete depending on your skill level. It’s a fun little rainy afternoon project. This scarf is great for beginning and advanced sewists alike. Sewer (one who sews) and sewer (dirty water) are spelled the same, so I personally prefer the word sewist.
Supplies to sew a simple head scarf:
One yard cotton fabric
Fabric scissors
Ruler, preferably a long quilting ruler, but any ruler will do
Fabric pencil or marker
A safe cutting surface
Sewing Machine
Thread
Trim, such as ribbon or ricrac, if desired.
Step One- Iron
The key to successful sewing is to iron, iron, iron, and then iron some more. In fact, when in doubt, iron.

If you preshrink your fabric first by washing it is up to personal preference. Cotton fabric will shrink with the first wash. If you sew the scarf without preshrinking then the stiches may become bunched, or the fabric will become unsquared. However, some sewists and especially quilters find working with unwashed fabric easier. If you sew clothing, you should always preshrink your fabric. I preshrink my cotton fabric 95% of the time but did not do so for this project.
If you wash your fabric first, you definitely need to iron the fabric extra well.
Step Two- Squaring your fabric
Please do not skip this step. It is a necessary step to ensure success. Squaring the fabric means that you are cutting on the grain lines and are cutting a piece of fabric that is true to its geometric shape. It is always calling squaring the fabric even if you are not cutting a square. In this instance you will be cutting a square and this process ensures that your square is even on all sides.
Unfortunately, the fabric you buy at a fabric store isn’t always cut straight. Even if the fabric cutter is careful to square the fabric on the table, it is not always put on the bolt square. A bolt is how the manufacturer ships the fabric. Most cotton and quilting fabric is 44-45” wide and is folded in half at the factory, cut into 100-yard lengths, and then put on cardboard to ship. This is one bolt of fabric.
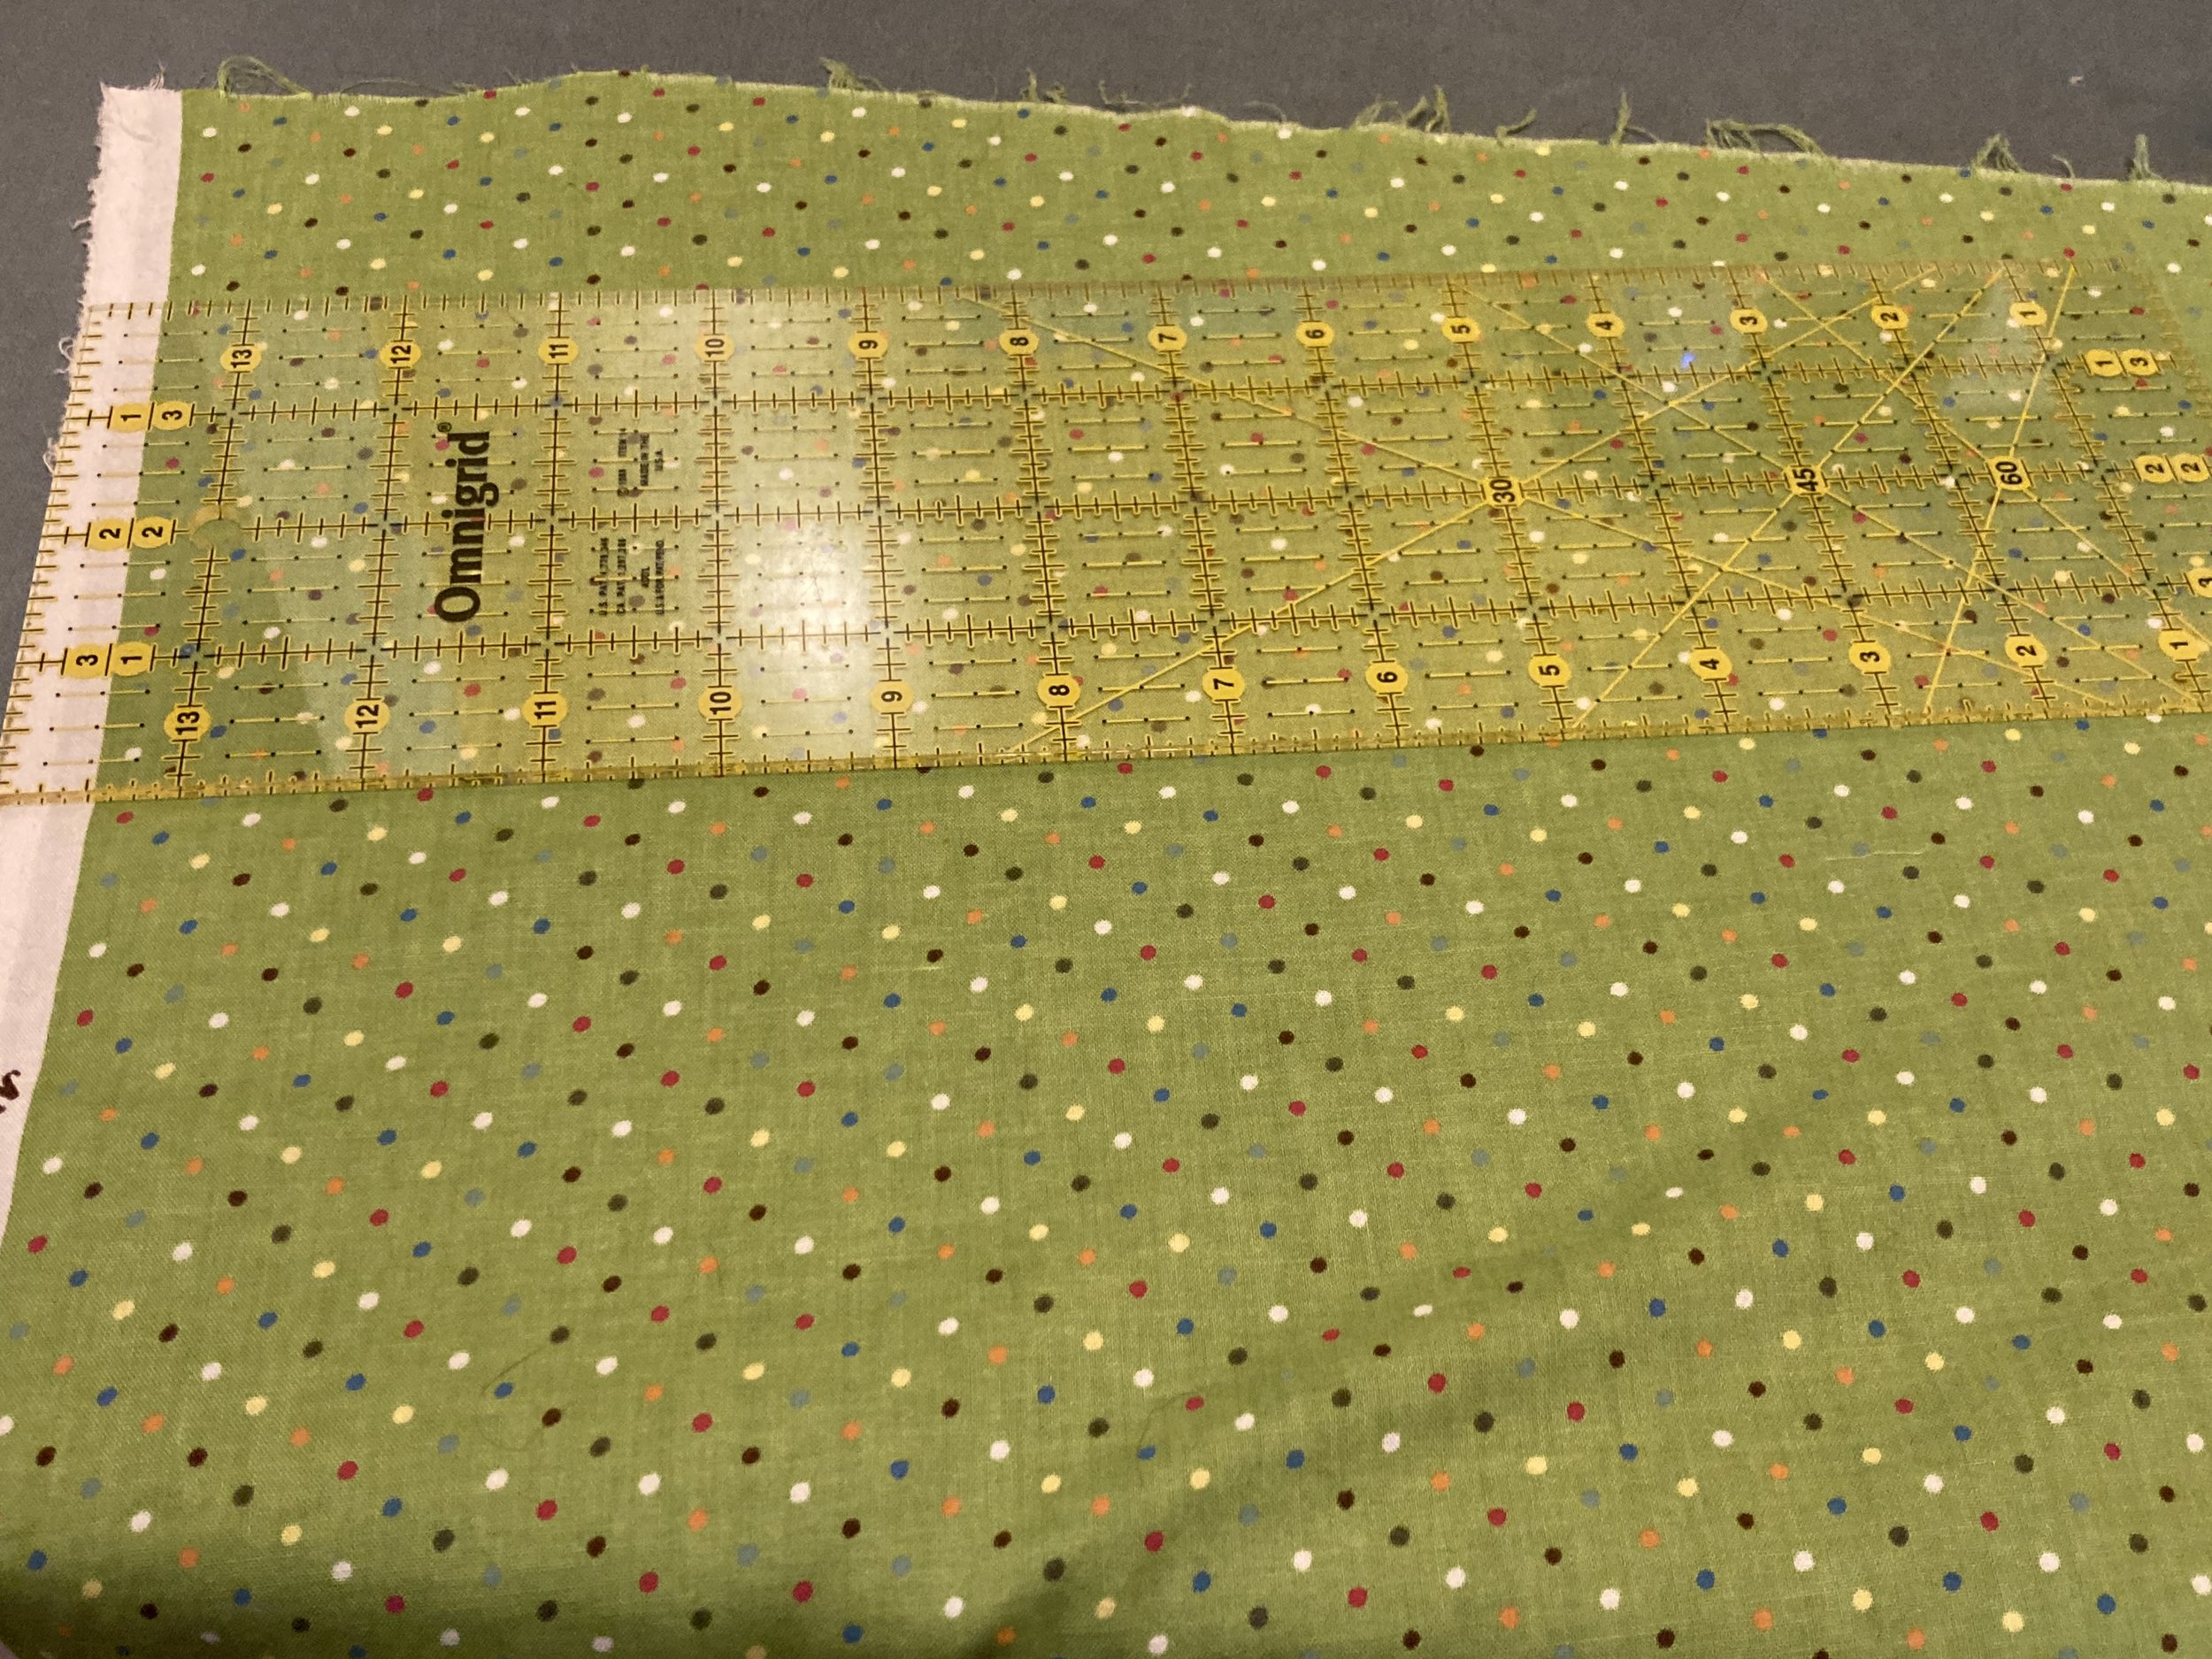
To square fabric means finding the straight grain of the fabric. Fabric is easiest to square if it still has the selvages. The selvage edges of the fabric are woven into the long edges by the manufacturer to ensure that the fabric does not unravel. One selvage edge is often white, as seen in the photo above. The selvage edge is always straight and on grain. To square your fabric with the selvage, first fold the fabric so that the selvage edges meet. Next, take a long wide ruler and line up one edge with the selvage edge. Use a fabric pencil or marker to mark the line and cut. This is shown in the picture above.
If your fabric does not have the selvages, you can either rip it or pull a string. Cotton fabric rips in a straight line along the grain. If you make a small cut into the fabric and tear it apart, you will have a straight line on the grain. The downside of ripping fabric is the edges tend to full of small strings and easily unravel. Another downside is that ripping is hard to do if one side of the rip is narrow. The torn edge will be hidden by the hem you are placing in the head scarf. If you rip the fabric, this ripped edge will be used instead of the selvage to square the fabric.
To use one thread to find the grain, or straightness, of a fabric, you will need to make a small cut on the edge and locate one thread. Start to the pull the thread out slowly. You will be able to see a cut line on the grain of the fabric. If you use this method, the cut edge will be used instead of the selvage to square the fabric.
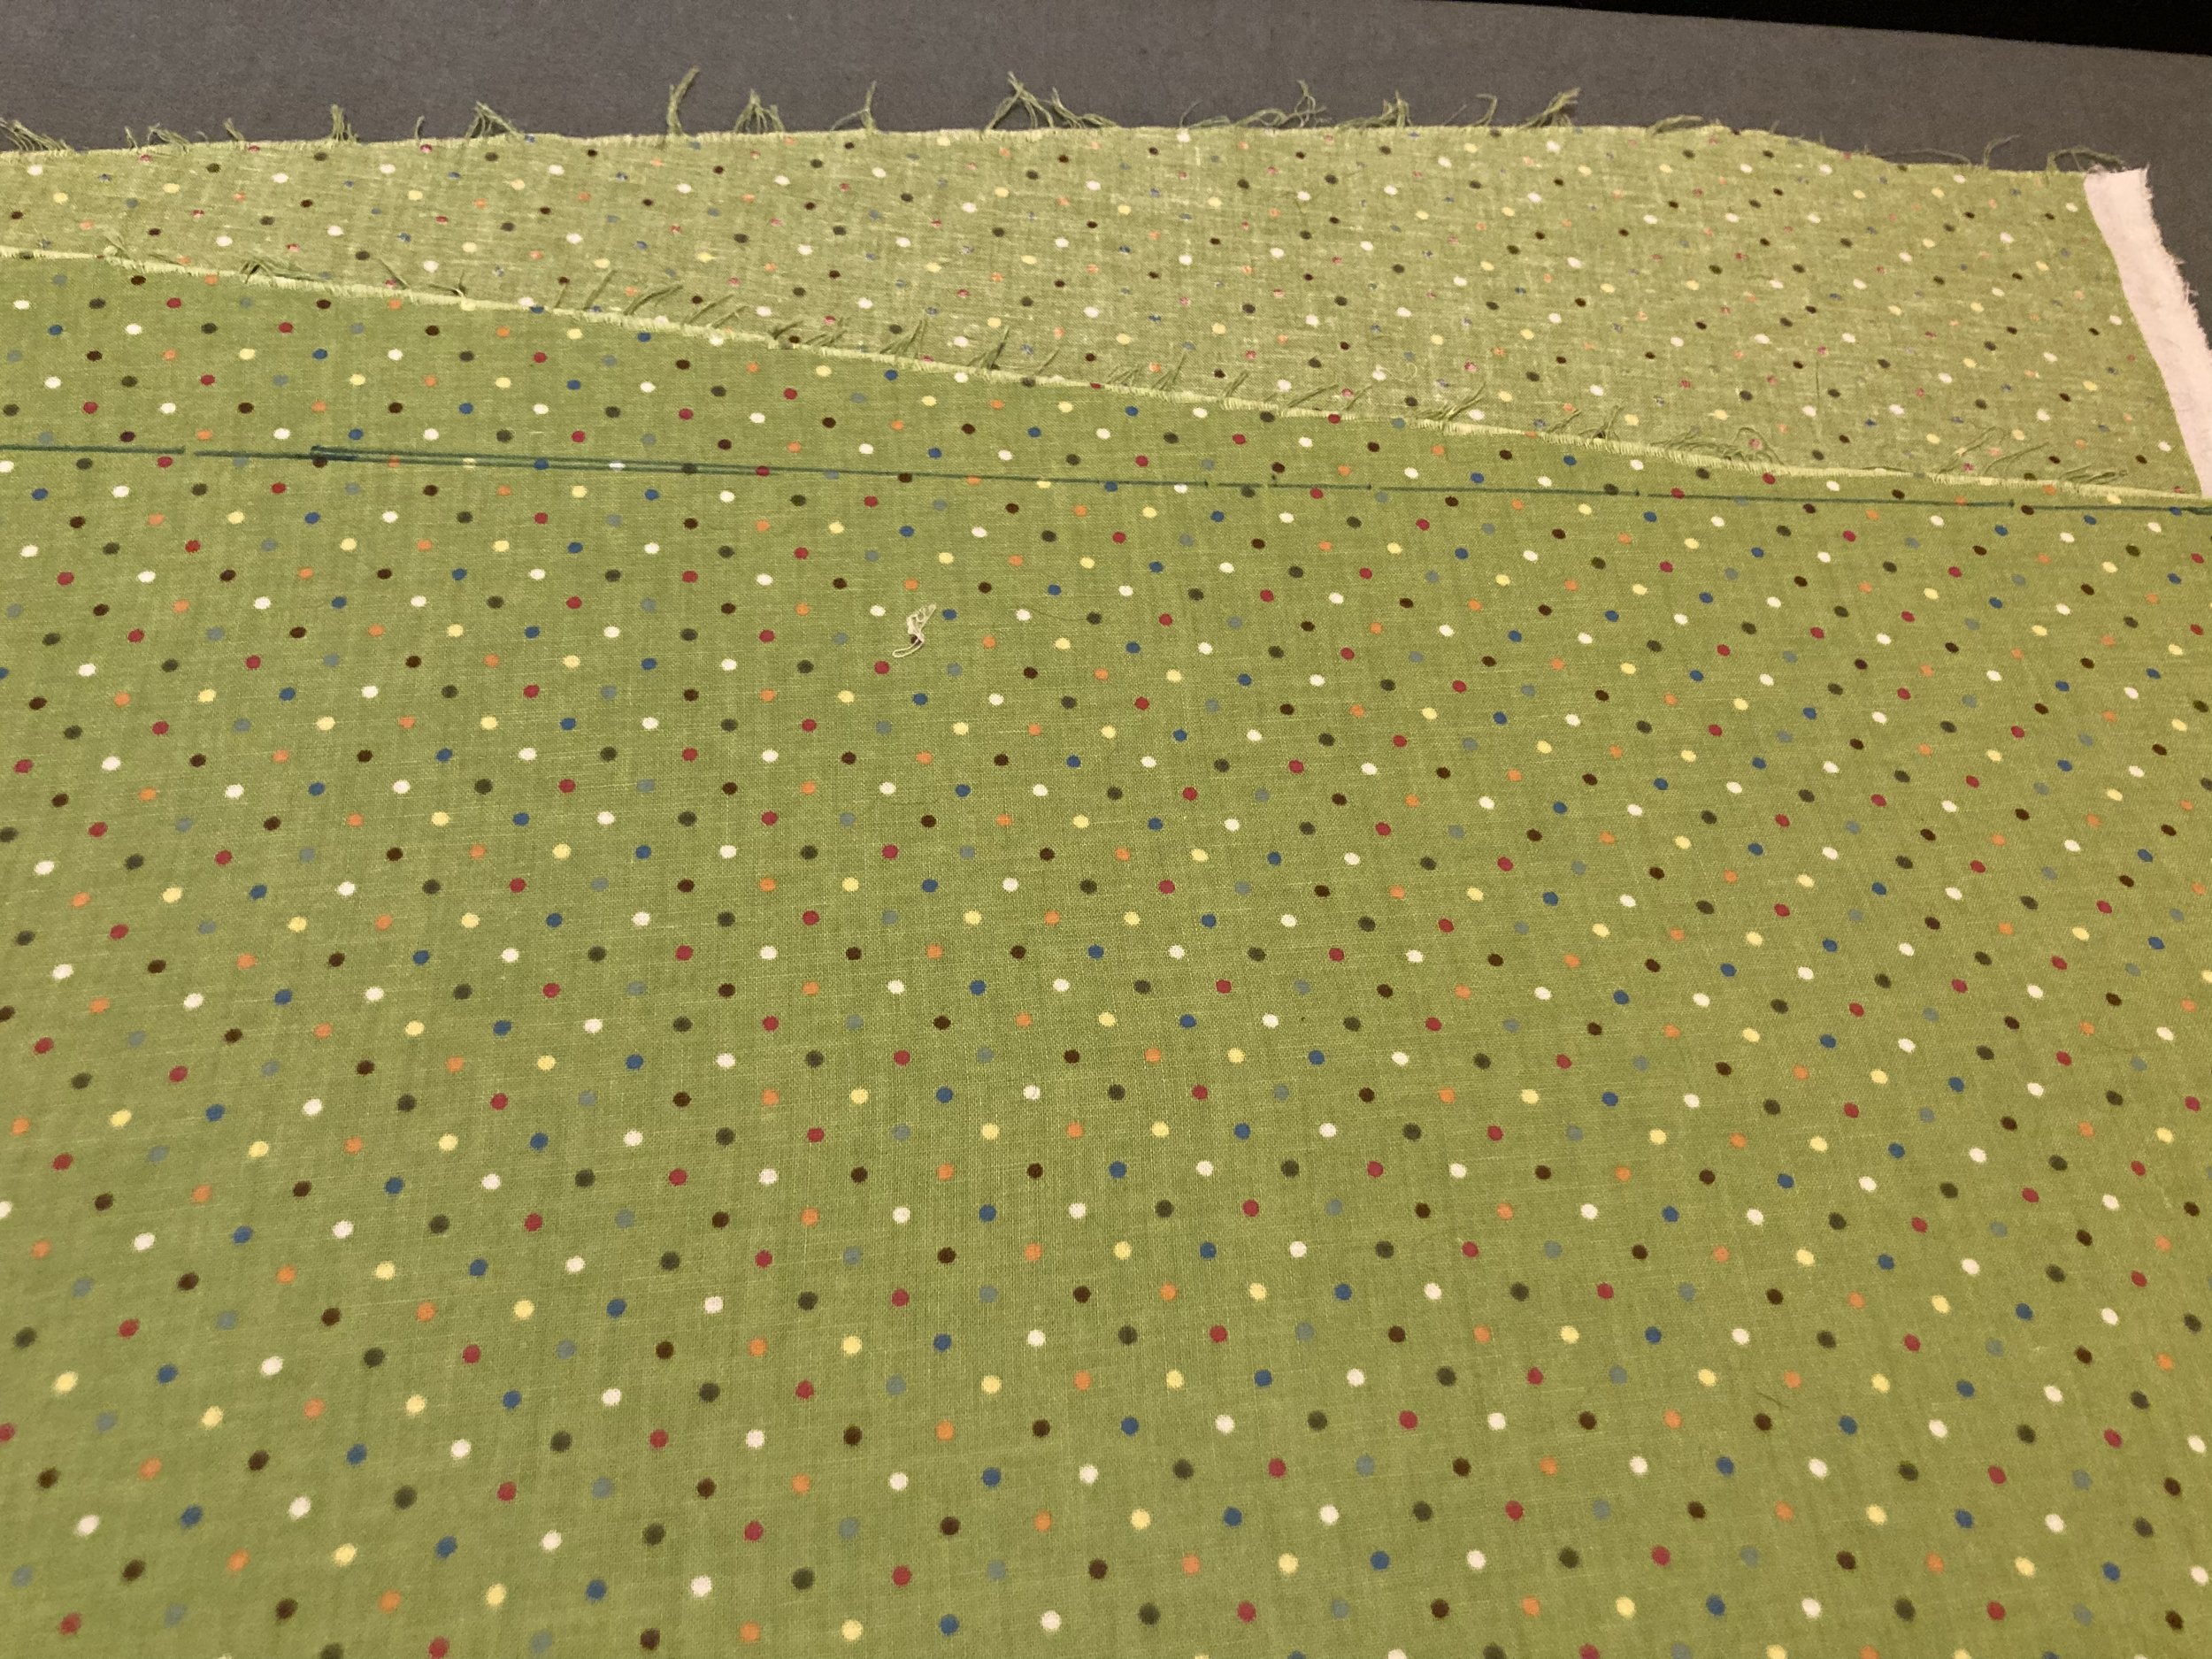
You can see in the picture below how much fabric was lost in squaring the fabric. The cut edge is from the fabric store. The marker line is the squared edge.
Step Three- Measure and cut 26”
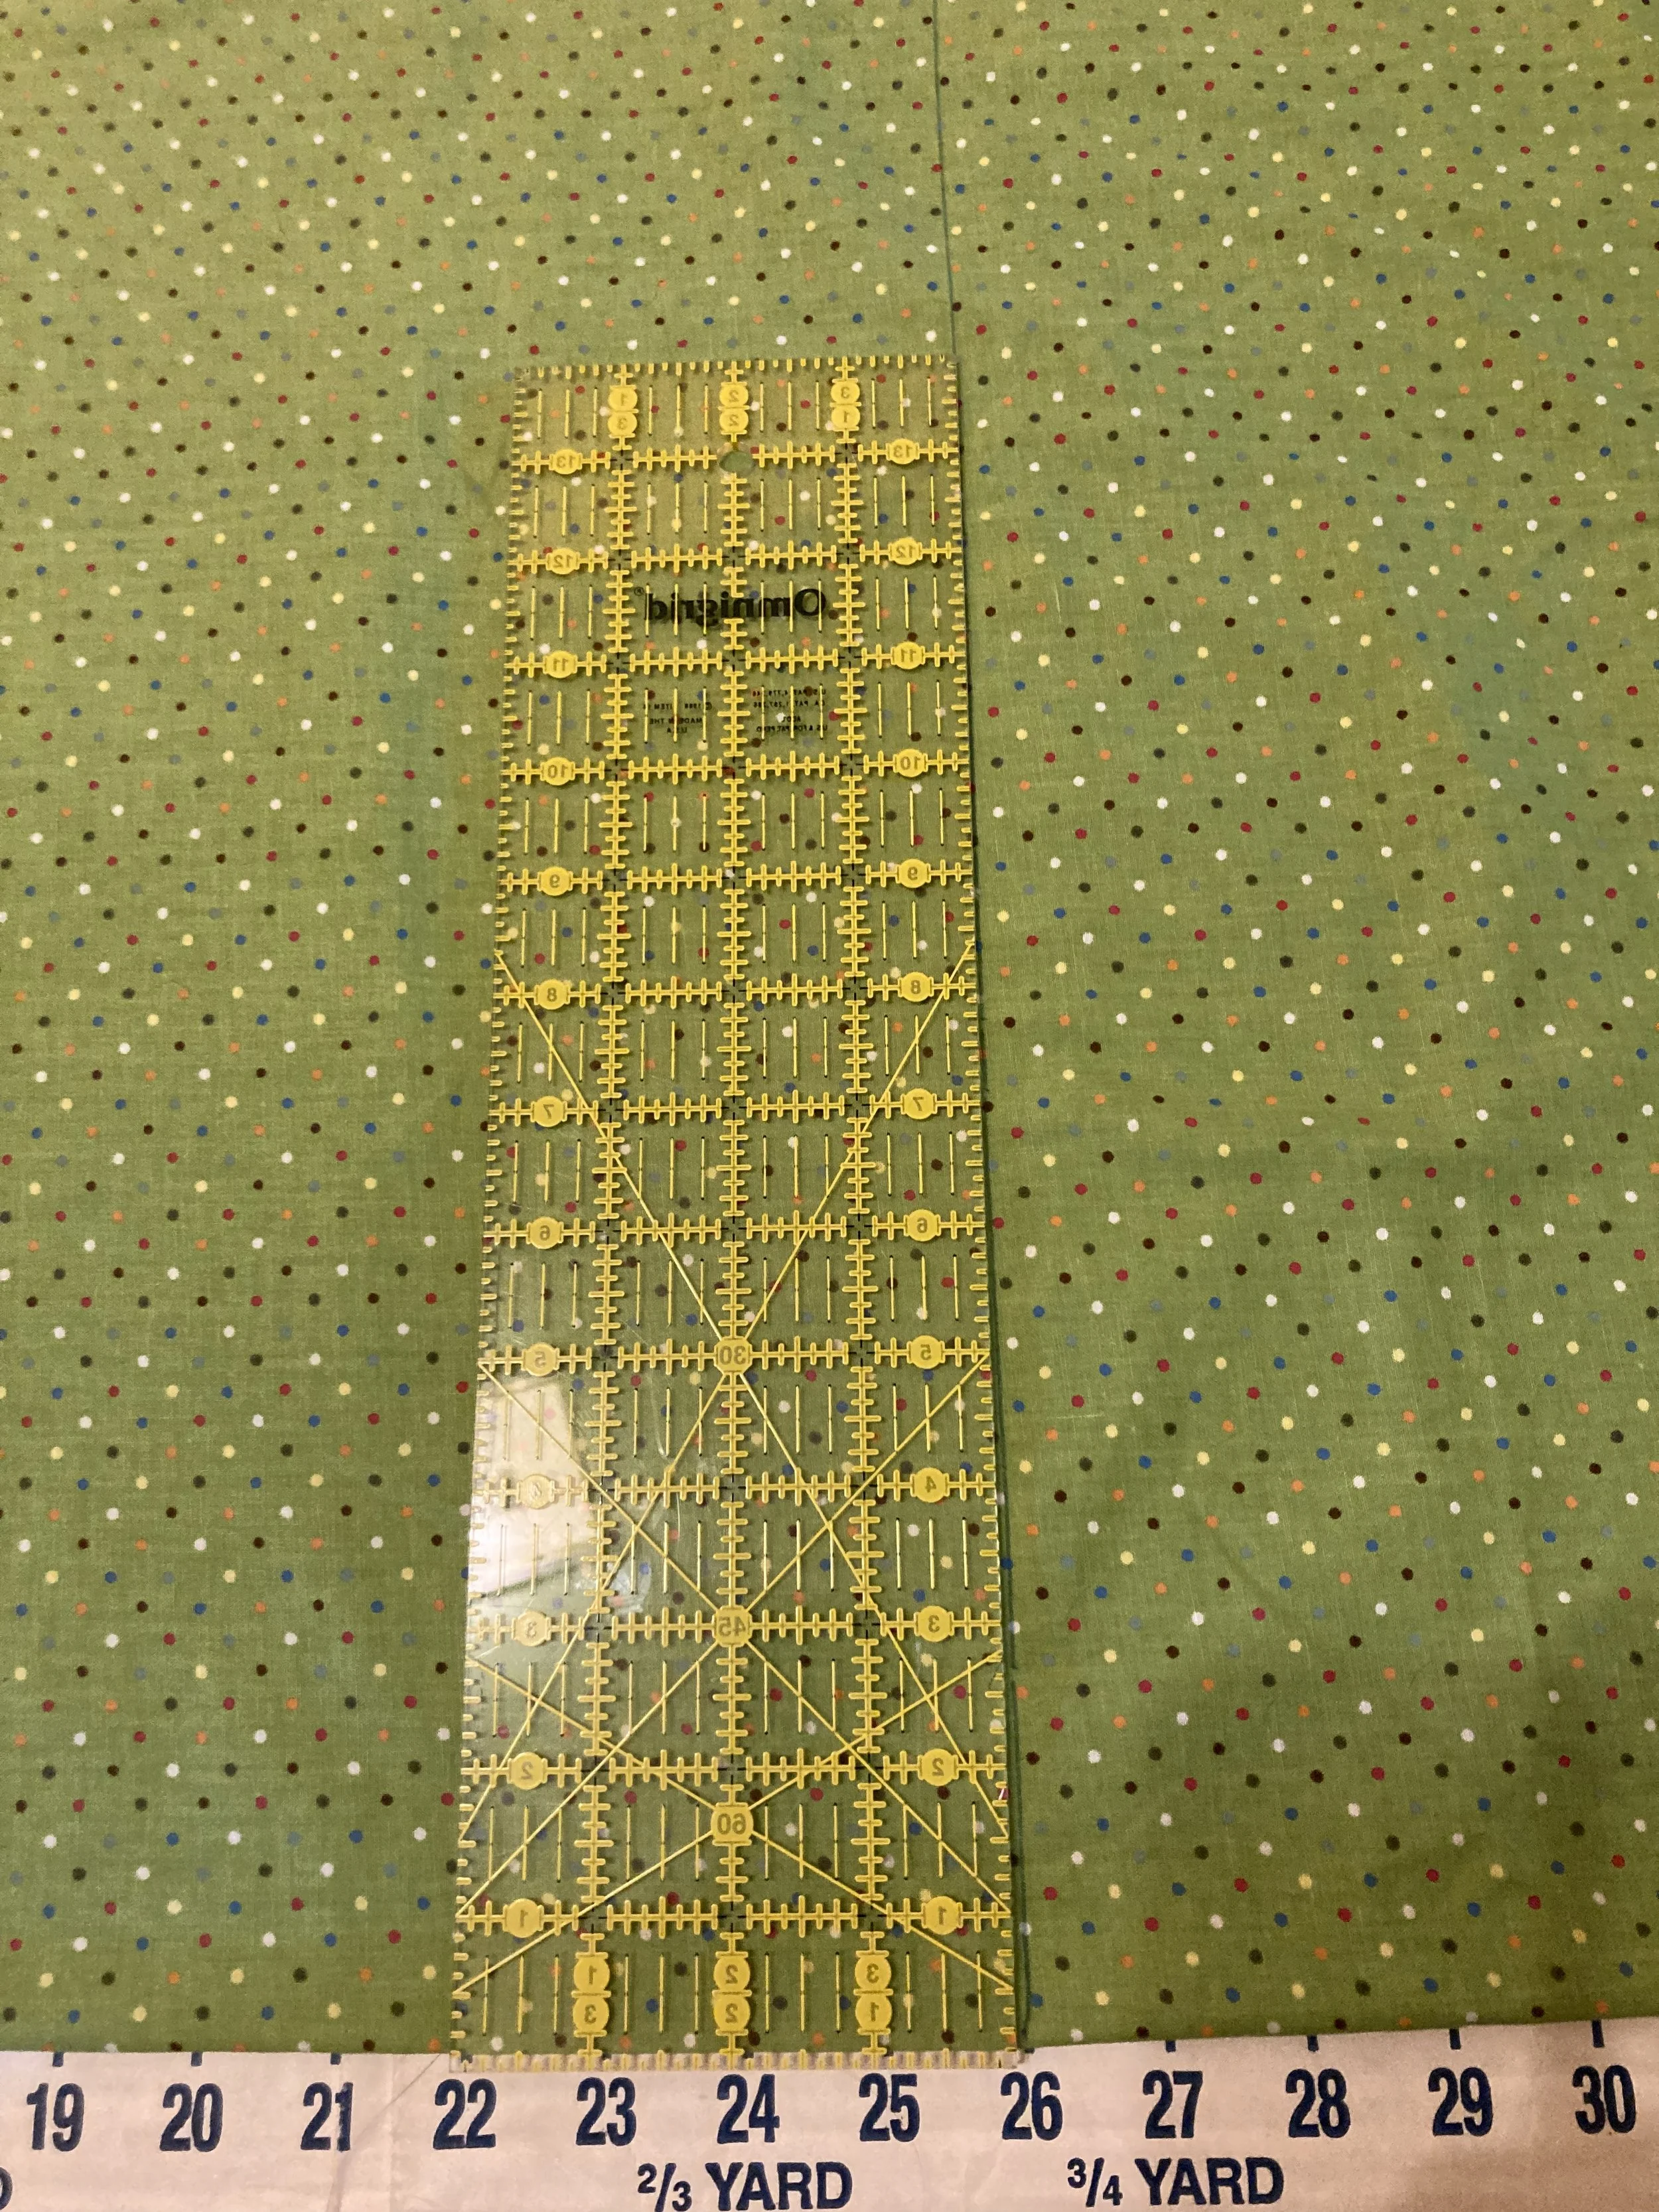
With two straight edges on your fabric, you can now measure 26” on all sides. Be sure to cut the selvage edge off before you measure. The first two edges that you will measure 26” on will be your selvage edge and the edge you cut in Step Two.

To cut your fabric you will need to lay it out on the floor or a large table. I find using a large foldable cardboard pattern cutting matt makes this step extremely easy to get everything straight. You can purchase one for $22 at JoAnn’s and they are a good investment and last for years. Plus, they make good forts to entertain small children while you sew. (Not an affiliate link, I am including it for your reference)
On your selvage edge carefully measure 26”. If your head is large, you can measure a few inches larger. If this scarf is for a child, you can measure a few inches smaller. I wear hat size 7 1/8” and this fits perfectly when tied behind my head.
Step Four- Iron in your hem
Ironing in a hem is quite easy but you do want to take your time to do it right. I used a 1/2” hem on this project. With the wrong side of the fabric facing up, fold over 1/2” and iron the seam in. Use a ruler or a hem guide to help you keep an even 1/2” as you iron. Set your iron on the cotton setting and make sure to use steam to help press the seam in firmly. You are going to use the crease lines later on to make mitered corners.

On the same edge you will repeat the step, folding another 1/2” to create a hem with no exposed edge.

Repeat for the other three edges working on one edge at a time. At the corners simply carefully fold over. If you do want to attempt mitered corners, then skip to Step Six. However, mitered corners are not difficult and are a great way to add a finished look to this head scarf.
Step Five- Miter the corners
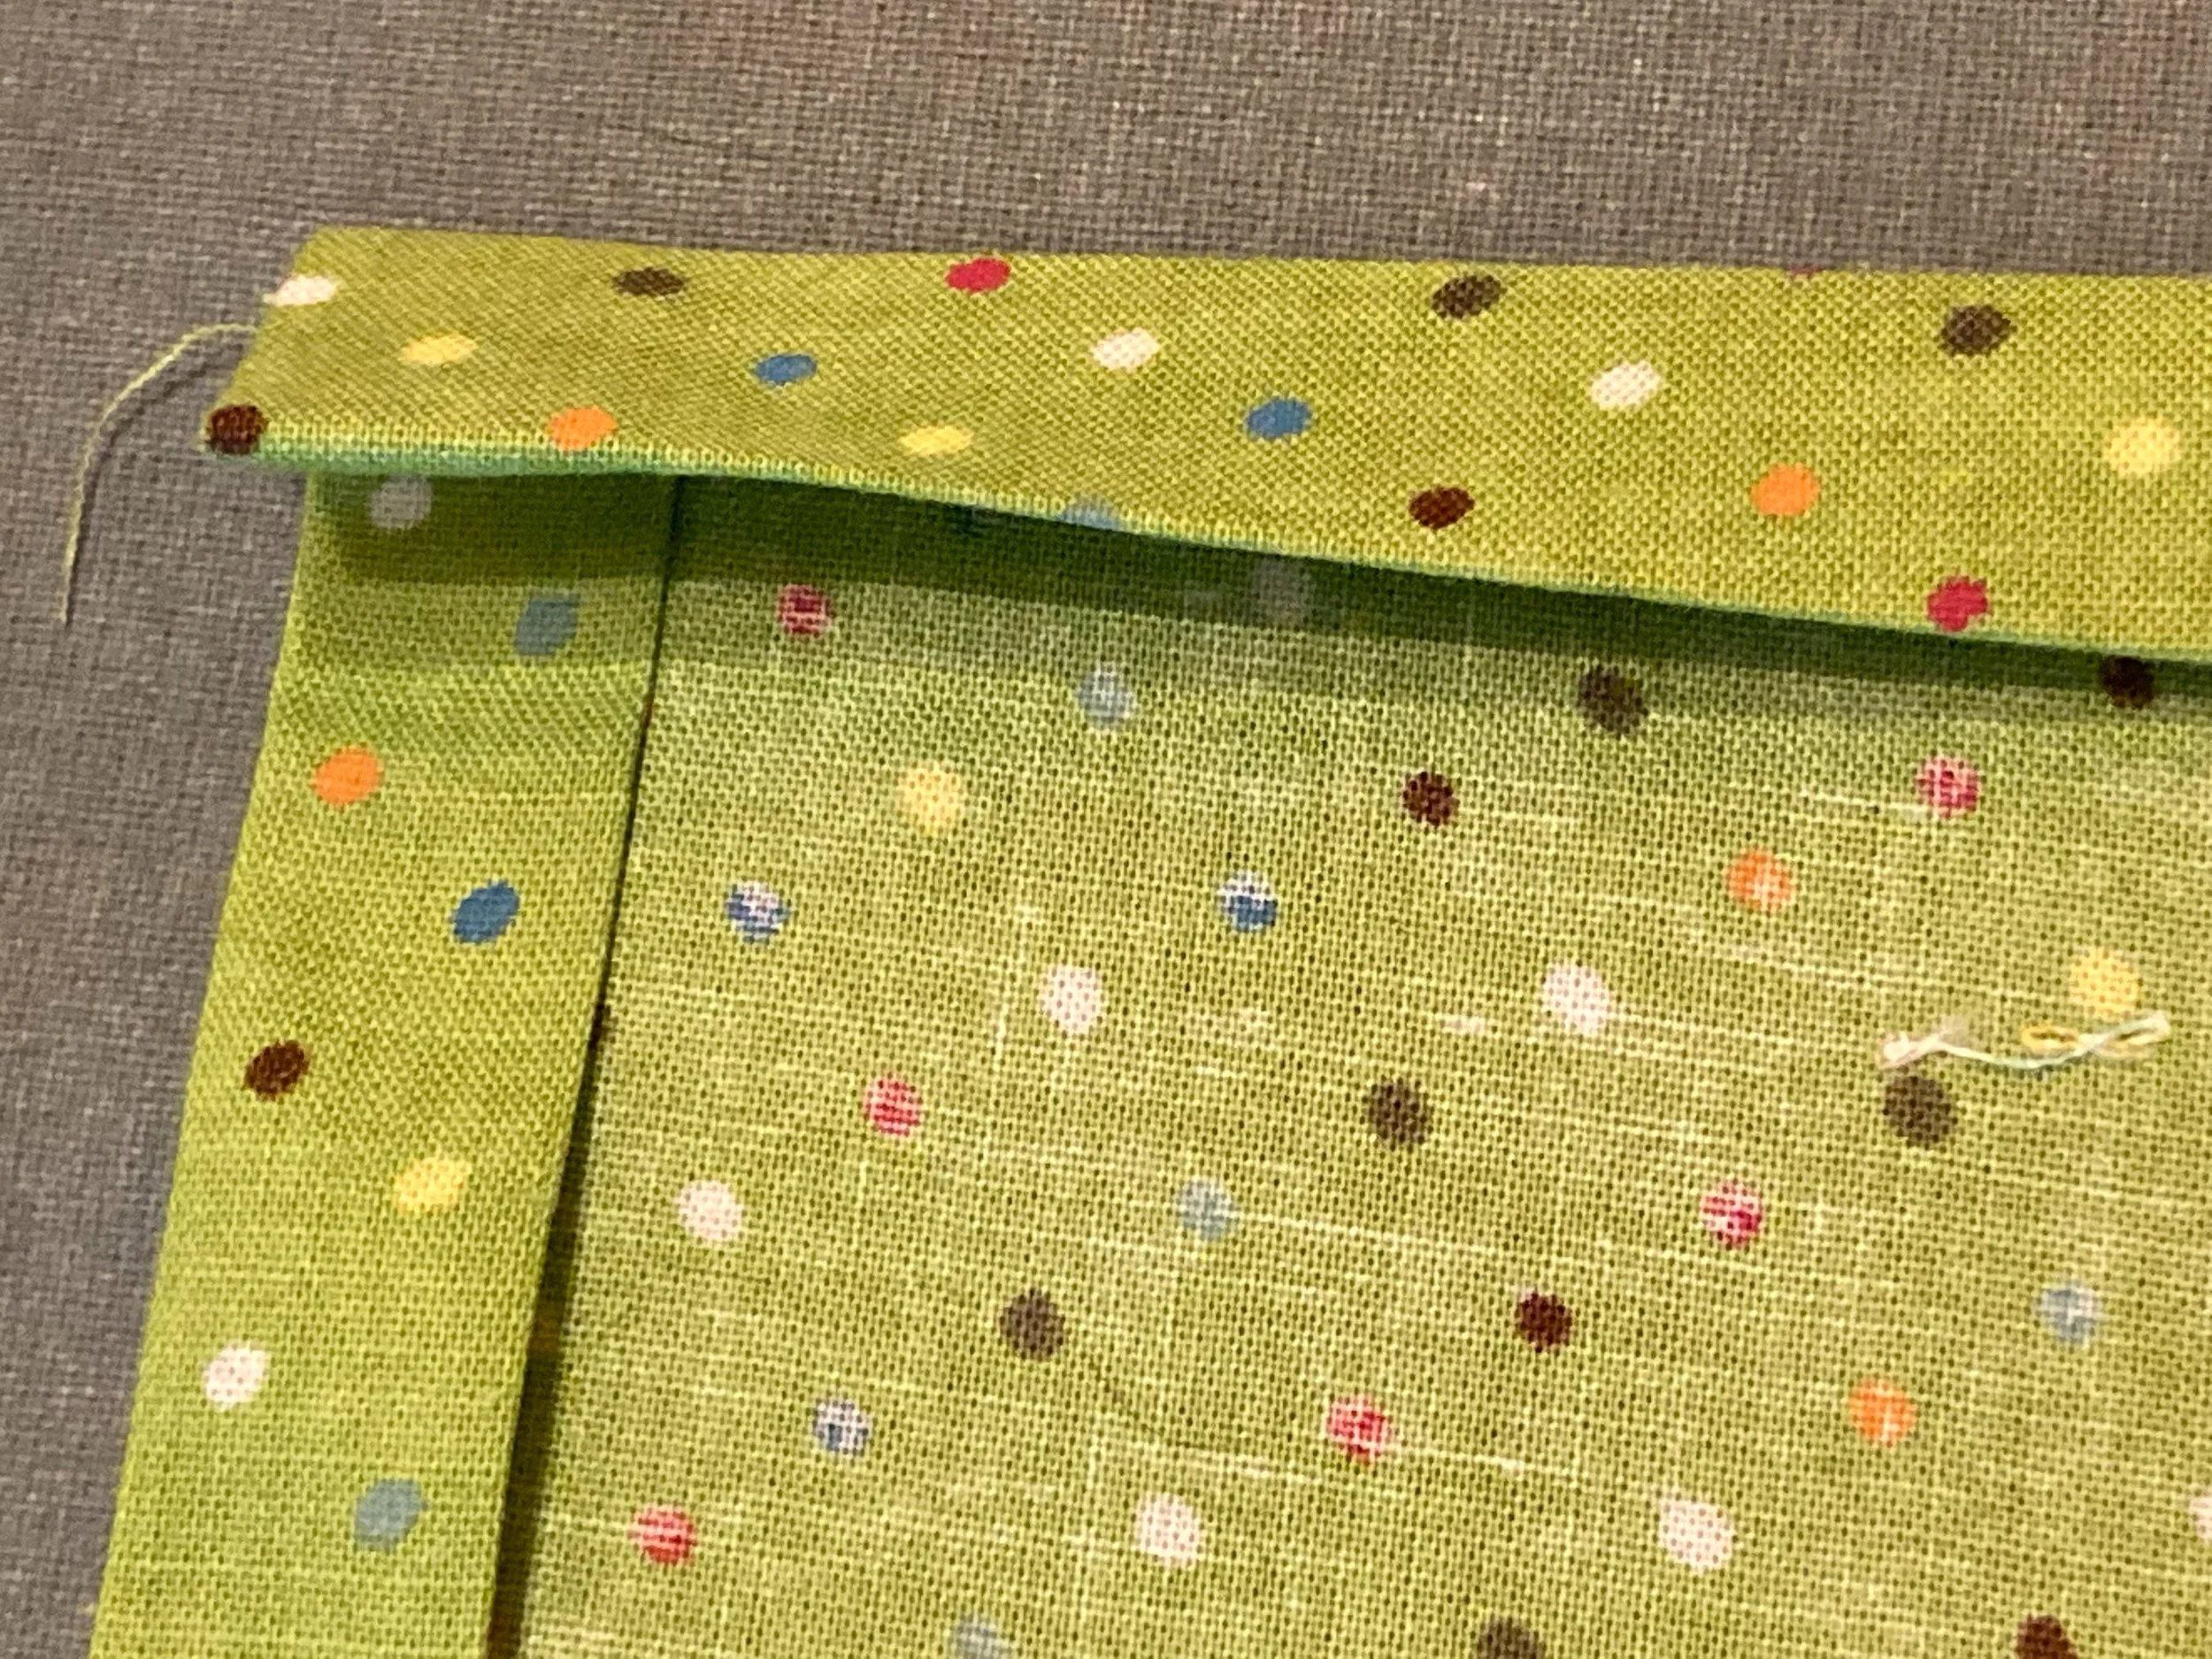
For this scarf I choose to put in full mitered corners. A mitered corner is when your two edges meet at a 45-degree angle. A full miter is when the raw edge of the fabric is fully enclosed in the hem. This is shown in the photo below.

Strong press lines from Step Four are helpful. A rotary cutting mat marked with a 45-degree angle is handy but not necessary. Carefully open the folded edges of one corner. Using a ruler, draw a diagonal line between the two points where the farthest press lines intersect, as shown below.
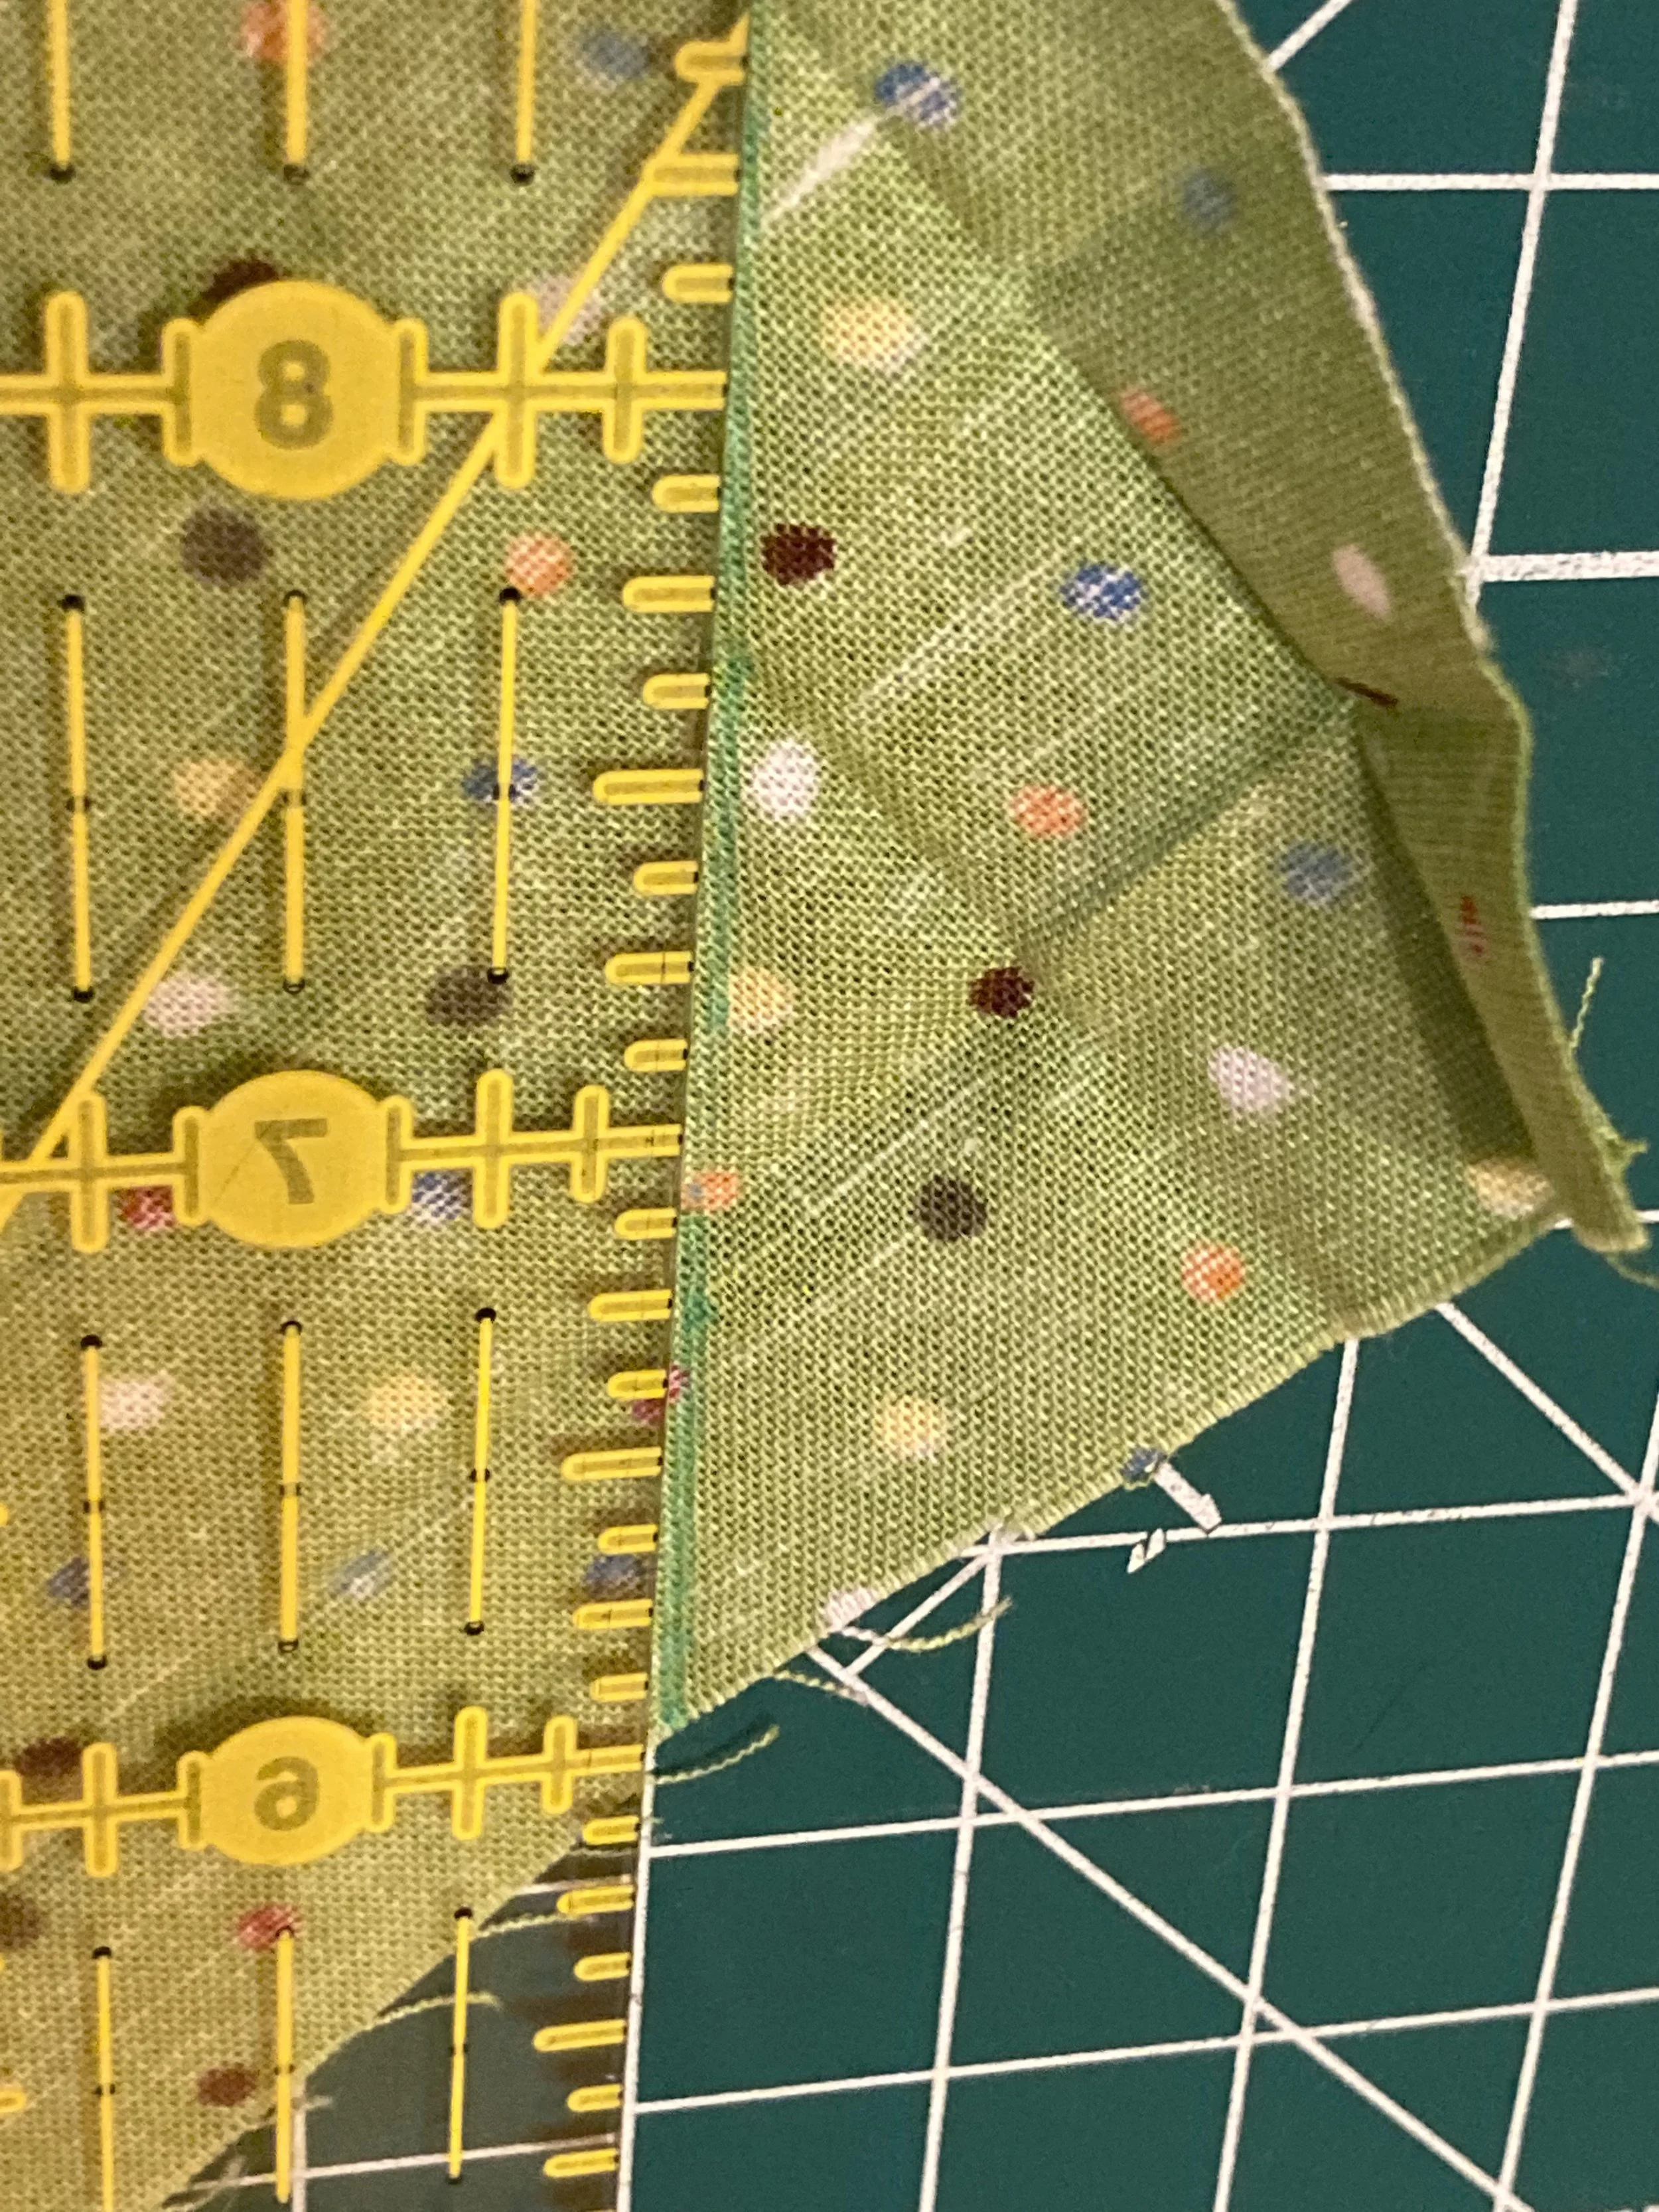
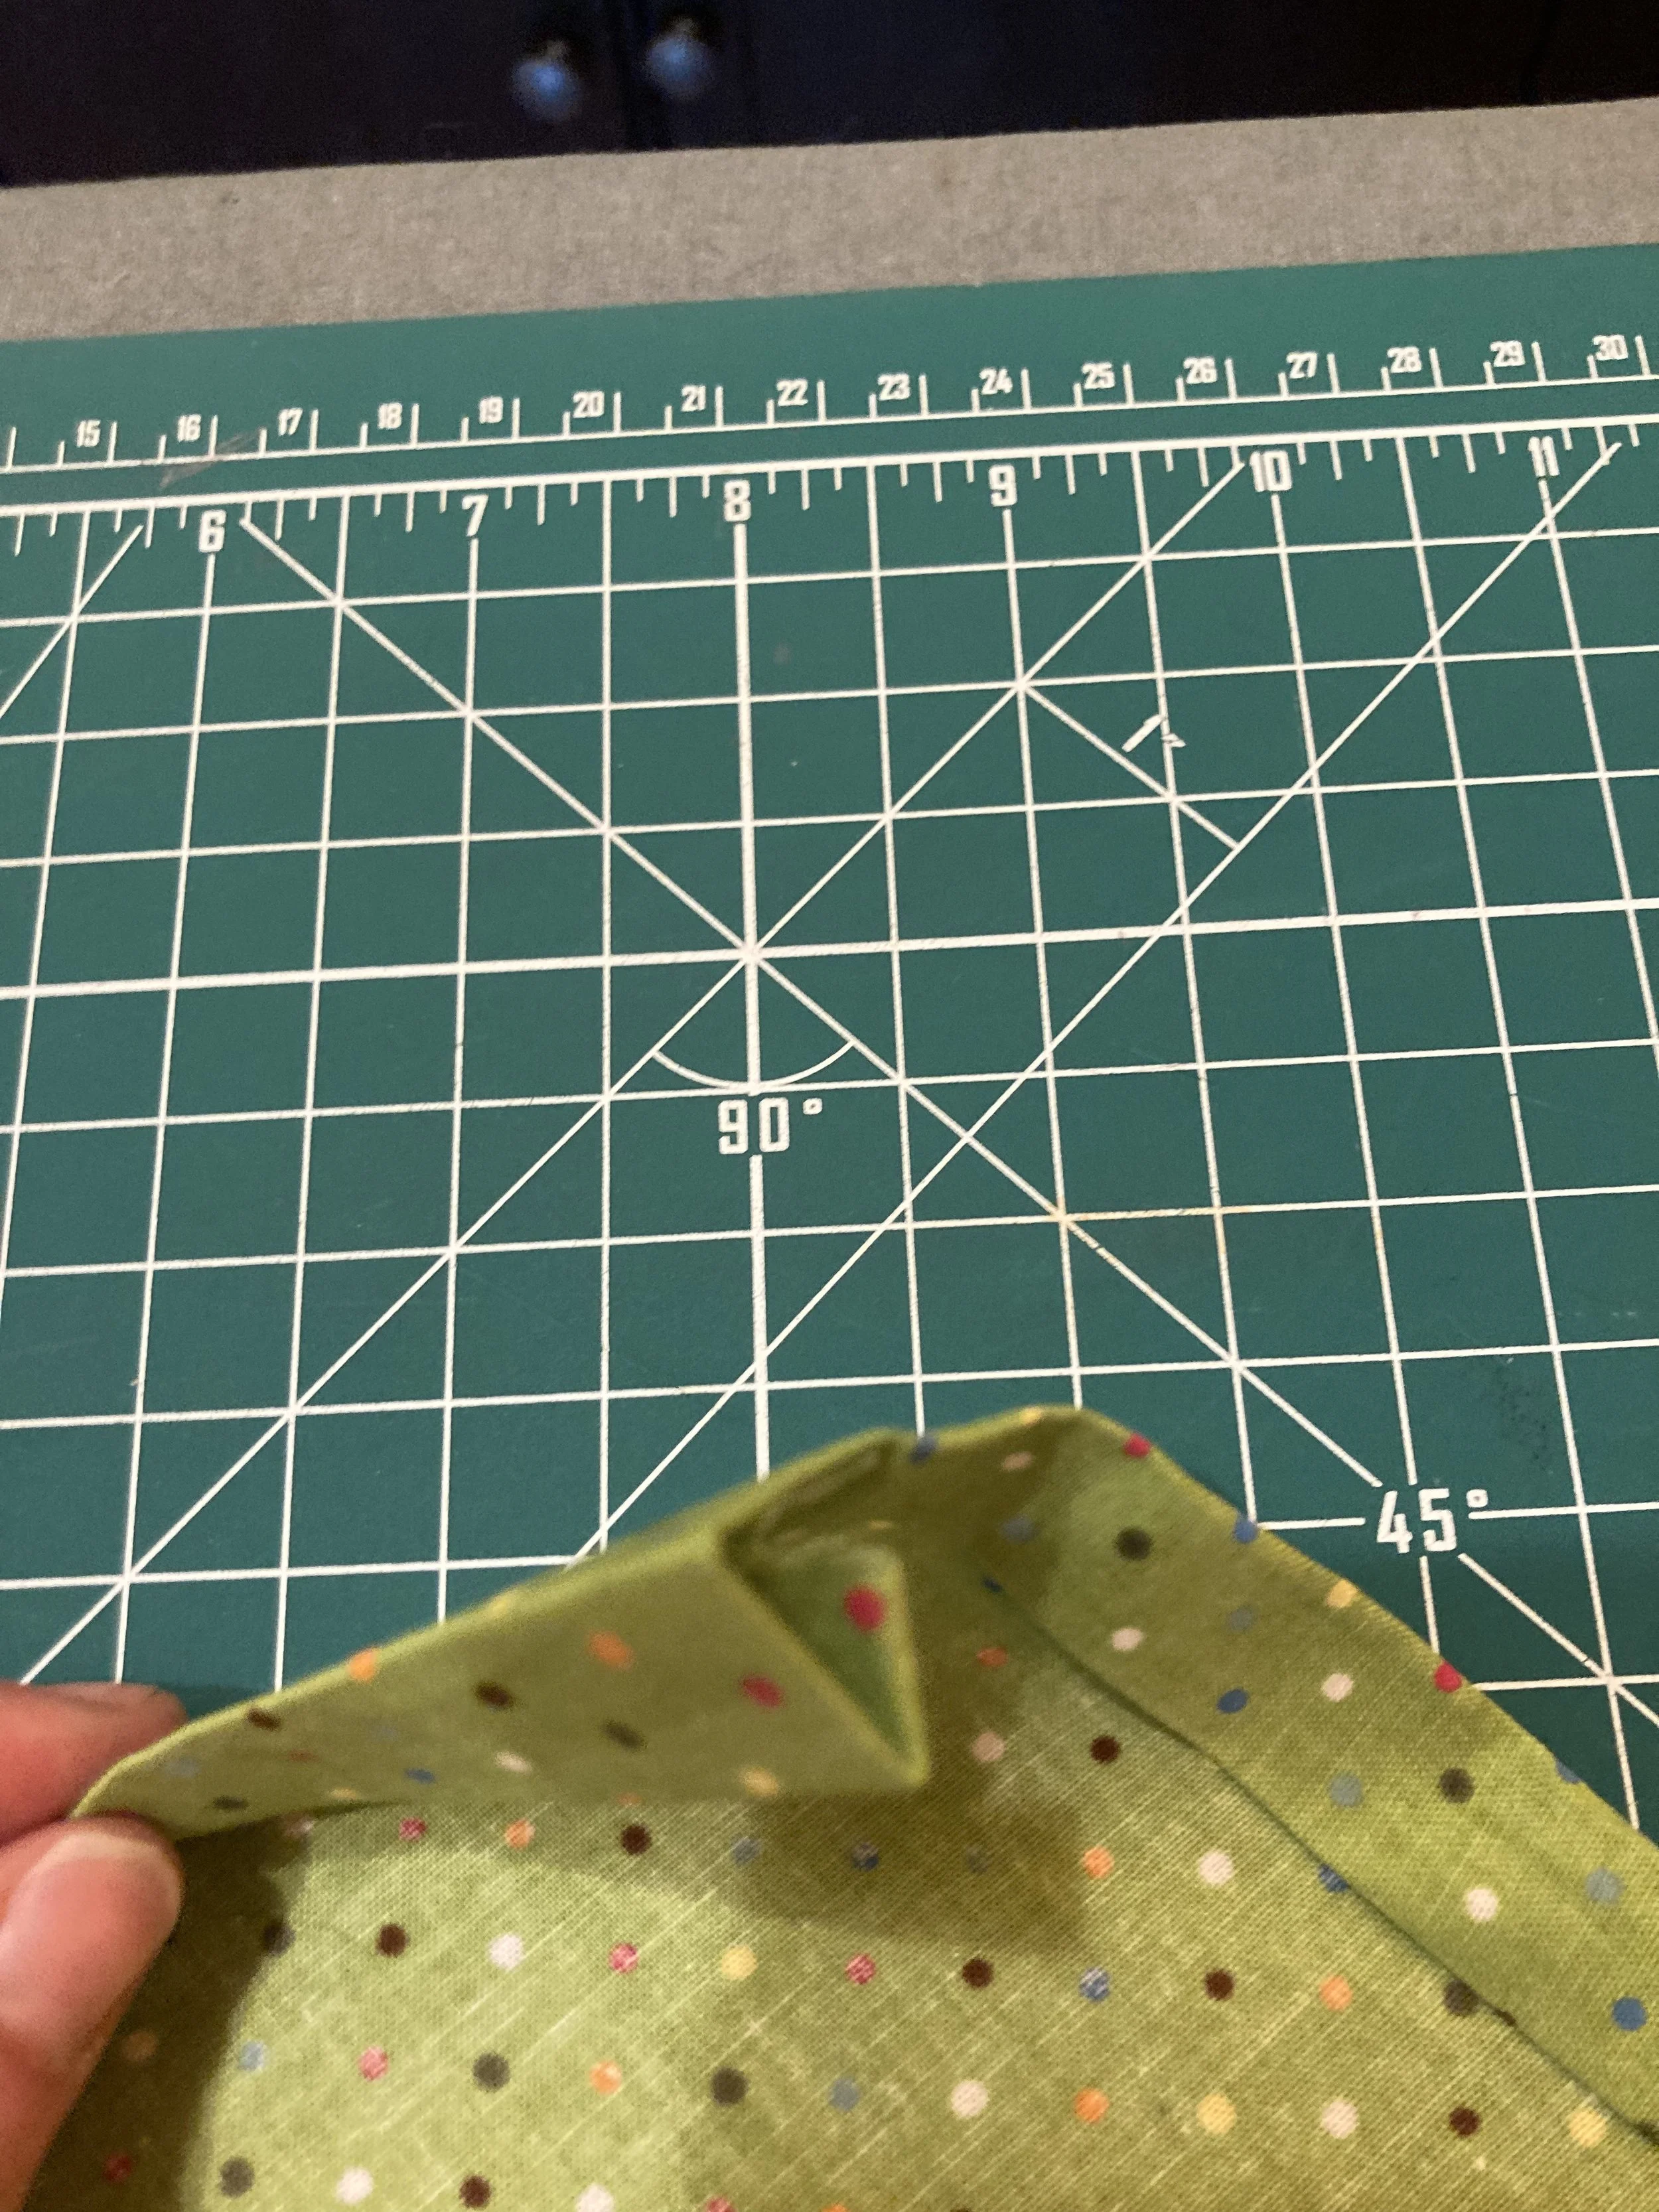
If you have a marked rotary cutting mat, align the corner with the two lines marked 90°. Your points should align with a horizontal line on your cutting mat. Use a marker to draw a line through these points. Drawing this line on both sides of the fabric is handy but not necessary.
Carefully refold only the first pressed fold line on both sides of your corner. Fold the scarf right sides together so that your corner comes to a point and the marker line matches front and back. Stitch along marker line. Cut off the point to avoid extra fabric. Repeat with other three sides. This step is shown below.

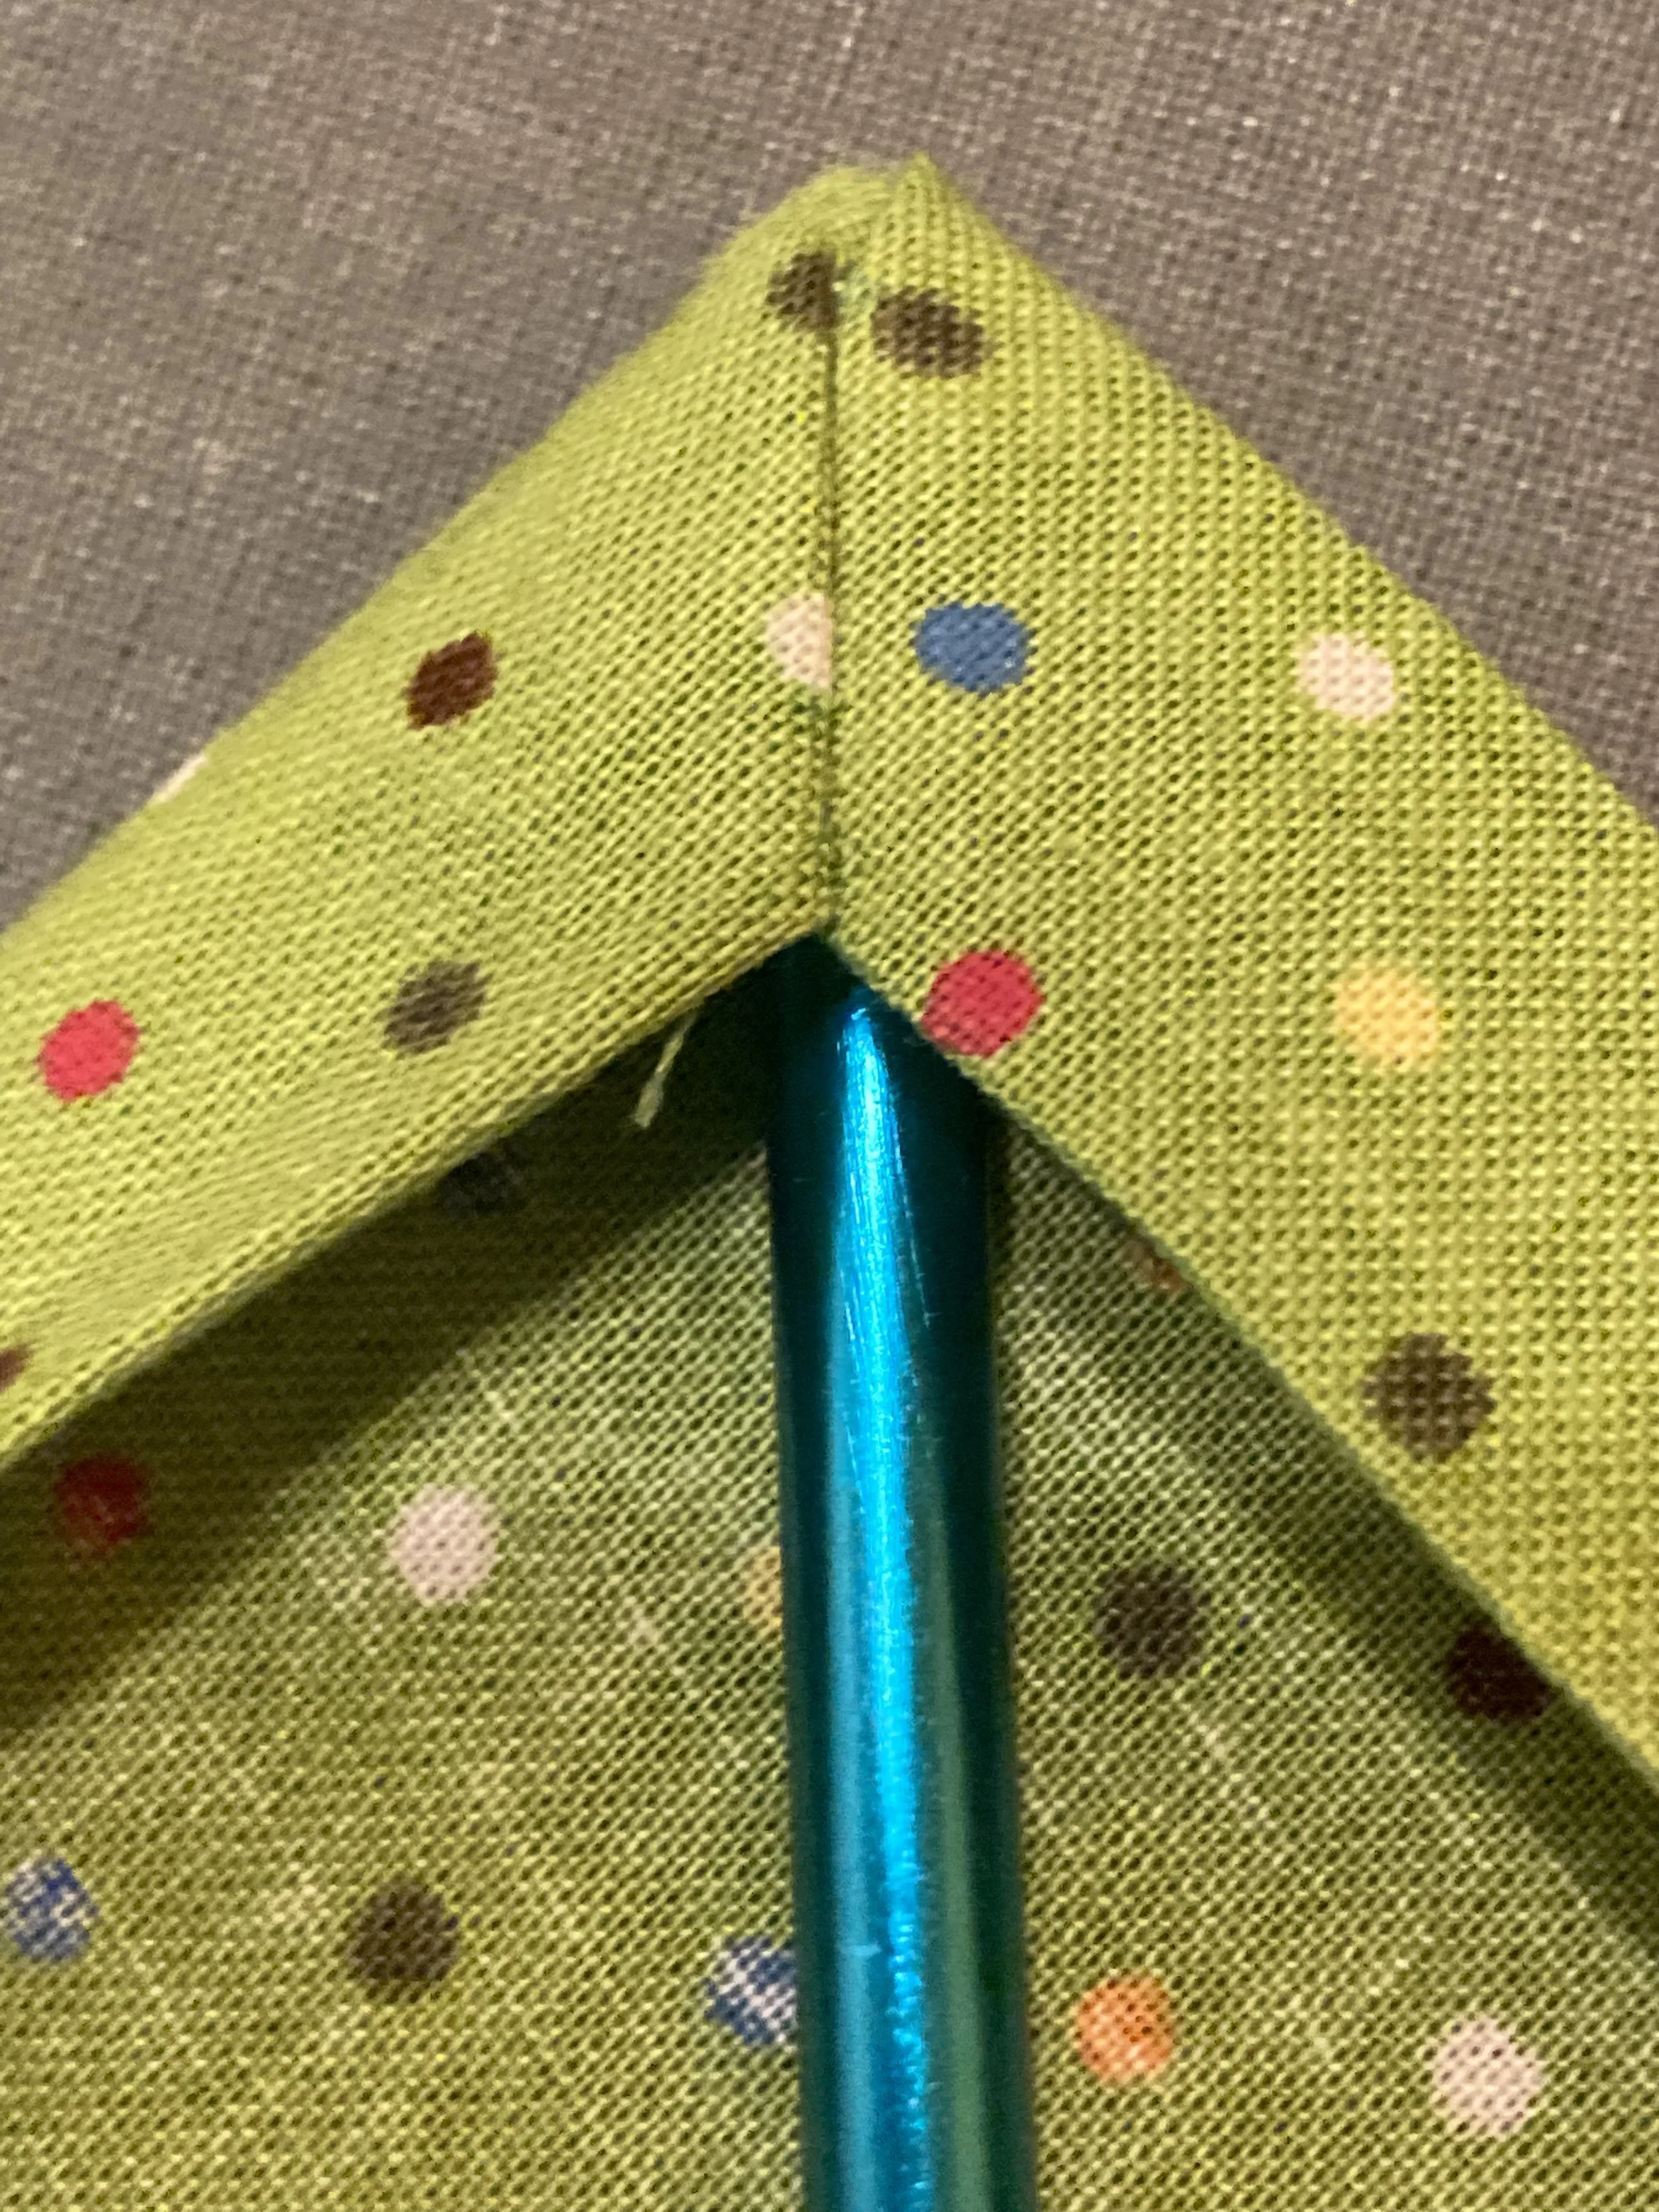
Turn all your corners right side out along second pressed line. Use a knitting needle or a pencil to gently insert into your corner to press the fabric out, as shown below.
Step Six- Topstich
Starting in one corner, carefully sew in the hem by topstitching near the fold line. For this project, a straight stich is fine. There is no need to finish the raw edge because it is fully enclosed in the seam. I used the inside edge of my standard sewing foot for a guide. Carefully stich around the corners. You now have a finished head scarf to help you bring style to the barn.

Optional Step Seven- Sew on Trim
I always add trim to my head scarves. I think it creates an even cuter finished product. You can finish two adjoining edges or the whole scarf. You can use any trim, ribbon, or ricrac. Personally, I really like ricrac. Carefully pin your trim on the right side of the fabric centered over the topstitch.

Carefully turn and pin the corners.

Starting at one corner, sew the ribbon or ricrac on. Narrow ribbon or ricrac only needs one stich, in the middle. Wider ribbon may need to be stitched on near the top and bottom of the ribbon. Use your judgement if you need a single stitch line or two.

Voila! You have a finished head scarf and now you are ready to take it to the barn, if you dare get your cute new scarf dirty.


How to Sew a Simple Head Scarf
Ingredients
- 1 yard cotton fabric
- Fabric scissors
- Ruler. Preferably a long quilting ruler, but any ruler will do
- Fabric pencil or marker
- A safe cutting surface
- Sewing machine
- Thread
- (Optional) Trim such as ribbon or ricrac
Instructions
- Prewash 1 yard of fabric and iron well.
- Square your fabric by finding two perpendicular grain lines. For your first line you will use the selvage, a ripped edge, or pull a thread to find the grain line. For the second and perpendicular line you will use a ruler.
- Measure and cut 26" on all edges. Start with the two edges from Step Two.
- Iron in the hem. Start with folding and ironing in a 1/2" hem on one side. On the same side, fold the fabric another 1/2" and iron the fold line well. Repeat for the 3 remaining sides.
- Miter the corners. If you do not want to miter corners, skip to Step Six. Carefully open the folded edges of one corner. Using a ruler, draw a diagonal line between the two points where the farthest press lines intersect. If you have a marked rotary cutting mat, align the corner with the two lines marked 90°. Your points should align with a horizontal line on the cutting mat. Use a marker to draw a line through these points. Drawing this line on both sides of the fabric is handy but not necessary. Carefully refold only the first pressed fold line on both sides of your corner. Fold the scarf right sides together so that your corner comes to a point and the marker line matches front and back. Stich along marker line and cut off the point. Repeat with other three sides. Turn your corners right side out at the second fold line and insert a knitting needle to create sharp corners.
- Starting in one corner, topstitch near the fold to keep hem in place. There is no need to finish the seam because it is fully enclosed. Carefully sew around corners.
- (Optional) - Sew on trim centered on topstitch line. Ricrac and narrow ribbon can be sewed on using one stich in the center of the trim. Wider ribbon may need to be stitched in place near the top and bottom edges of the trim.
Notes
Visit How to Sew a Simple Head Scarf — Mossygoat Farm for more detailed instructions.
Do you have more questions? Email us! We love to hear from you!