How to Pressure Can Peas in a Duo Pressure Cooker/Canner.

Shelling peas are quite easy to pressure can and here is how-to pressure can peas in a Duo Pressure Cooker/Canner. Peas are a low-acid food and must be pressure canned. It is not safe to process them in a water bath canner.
My pressure cooker/canner is a Fagor Duo. Fagor went defunct in 2013. The good news is that in 2018 former employees formed a new company, Zavor. Zavor makes a Zagor Duo pressure cooker/canner which is nearly identical to the Fagor Duo. It is very important to note that both the Fagor Duo and Zavor Duo are designed specifically for pressure canning.
Can you pressure can in other pressure cookers or in an instant pot? You can not pressure can in other brands or in an instant pot unless they were specifically designed for canning. Certainly Fagor and Zavor are not the only brands designed for canning. Presto brand is the main brand of pressure canner used by home canners. Please check with the manufacturer before using a pressure cooker for canning.
When I bought my pressure cooker/canner in 2007 I was scared of pressure canning. The features of the Duo made the whole process a little less scary because there was no dials or weighted gauges for me to worry about. I just needed to remember steam setting and setting 1 (8 pounds psi) and setting 2 (15 pounds psi.). As an added bonus, there is a locking safety mechanism that prevents you from opening the lid if the pressure is too high. At the time I lived over 6000’ in elevation and having enough pressure was important to me. I now live at 250’ elevation and have learned to use my Presto pressure canner for large batches but to this day I prefer my Fagor Duo.
The Duo pressure canner has two pressure options. The high pressure setting is higher than many of the USDA recommendations. Both the Fagor and Zavor Duo have pressure settings of 8 and 15 psi. No USDA recommendation, including very high altitude, feature pressure greater than 15 psi. It is usually not a problem to cook at the higher temperature that the higher pressure brings. Sensitive items such as the peas I am presenting in this recipe MAY become mushy if you can at a higher pressure. However, I have canned peas at a lower pressure and there is no quality difference. When using a Duo for canning, use the setting equal to or higher than the USDA recommended pressure.
Please note that some people do not recommend using the Duo for canning because you can not follow USDA recommendations to the letter. Other homesteaders, like myself, are fine with this because we know we are still being safe as long as we hit the minimum psi for canning for the minimum time. The Fagor Duo and the Zavor Duo are both safe pressure canners if you follow pressure canning guidelines.

Raw pack method for pressure canning peas.

How to Pressure Can Peas in a Duo Pressure Canner
Ingredients
- English Peas. You will need 2 1/4 pounds of peas in pod per pint or 4 1/2 per quart.
- Non-iodized salt, optional
Instructions
- Shell the peas.
- Wash the peas by placing them in a colander and running cool water over them.
- Warm canning jars up by placing them in water and slowly bringing the water up to a boil.
- Fill your canning jars up with peas to one inch headspace.
- Add 1/2 teaspoon of non-iodized salt to each pint jar and 1 teaspoon to each quart jar. You can eliminate this if you are on a low salt diet.
- Add boiling water to the jars to 1 inch headspace.
- Run a non metallic knife or spatula against the inside of your canning jar to release all air bubbles.
- Wipe the rim of your jar with a clean cloth. Place on warmed lids and screw on bands to finger tight. Do not over tighten.
- Your pressure canner will need 3" of hot water in the bottom. Using a jar lifter, place the jars in the pressure canner.
- Line up the lines on your Duo lid and slide the upper lid into place.
- Boil for 10 minutes on the steam setting.
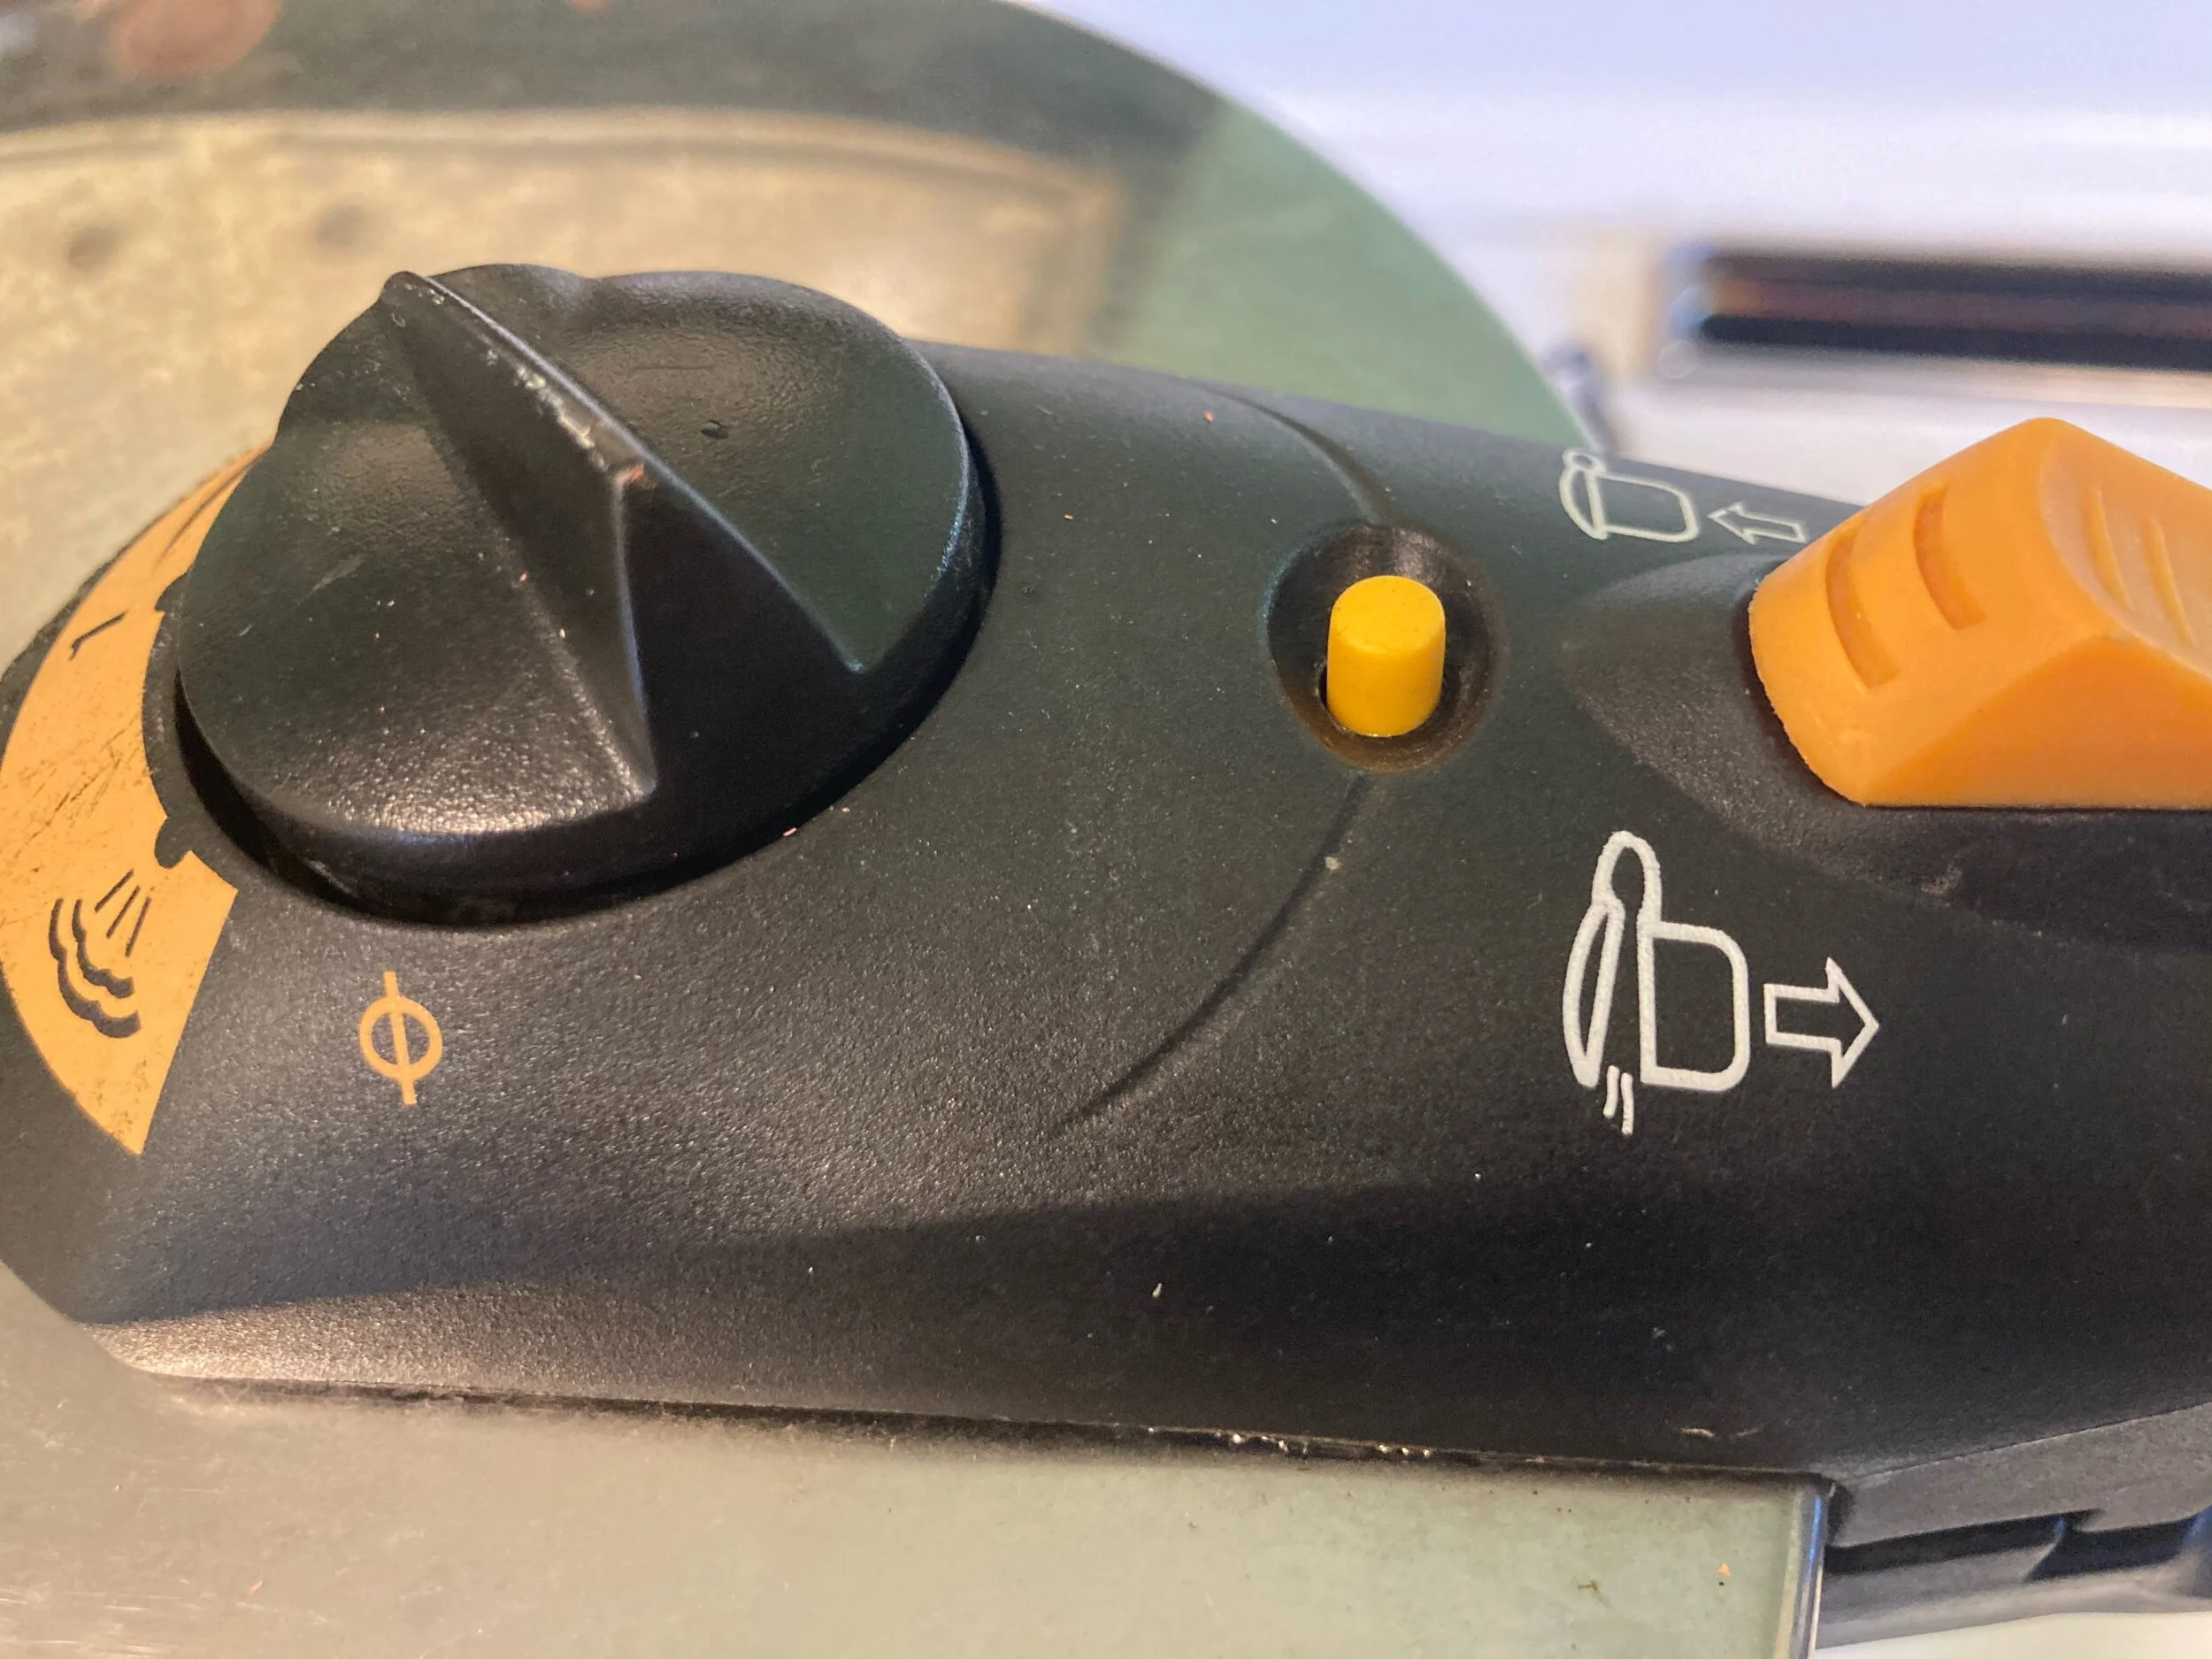
- Turn the dial to setting 2. Wait for the yellow button to pop up and steam to begin venting from the dial, This tells you that your canner is at proper pressure. Once it hits proper pressure, process for 40 minutes.
- Turn the heat off and let return to normal pressure naturally. You will know the pressure is safe to open the lid and remove jars once the yellow button lowers.
- Remove the lid and remove jars from canner using a jar lifter. Place them on a heat safe surface such as a dry towel. Check for sealing after 12-24 hours.
First you will need to shell your peas. Make sure you are canning shelling peas which are also called English peas. Snap peas are not suitable for this recipe. The difference between shelling and snap peas is found in the pod. The shelling pea has a pod that is more fibrous and is typically not eaten. The pod is removed and the peas inside the pod are eaten. Snap peas are typically eaten whole, pod and all. Again, this recipe is for shelling peas.
They do make pea sheller machines, both hand-crank and electric. However, I just shell them by hand. It is very time consuming but can be relaxing if you view it as quiet meditative time. I snap them in half and peel back the shell to expose the peas.

How many peas should you shell? It is commonly said that 20 pounds of peas, in their pod, will produce about 9 pints of pressure canned peas. That equals 2 1/4 pounds of unshelled peas to fill one pint jar once shelled. 4 1/2 pounds of unshelled peas are needed per quart. I personally prefer to can my peas in pint jars. We are a family of four. Larger families may want to can in quart jars. The processing time is the same for both pints and quarts, 40 minutes.
The second step in pressure canning peas is to wash your peas. You can use a colander and simply rinse them off.

These instructions are for raw pack peas. If you want to hot pack your peas then you will need to blanch your peas in boiling water for 5 minutes. Raw pack peas are delicious and I see no reason to take the extra steps for hot pack.
To prepare your jars, heat them in boiling water. You do not need to sterilize your jars because everything will be sterilized in the pressure canning process. However, you do not want your jars to break and this prepares your jars for the pressure canning process. I heat my jars in my pressure canner on the steam setting and this also helps speed the pressure canning process up because your water is already near boiling.

Ladle your washed peas into hot jars. You will need to leave 1” of headspace. This is very important because the peas may expand during cooking and you need to ensure that their is proper headspace. One inch head space is equal to filling mason jars to the bottom thread on the jar. There is no need to pack down the peas.

After you fill your jars to one inch headspace, add salt. Add 1/2 teaspoon to each pint jar and 1 teaspoon to each quart jar.
Salt is optional in pressure canning peas. Salt is used as a preservative in many canning recipes. When pressure canning peas though, it is only used for flavoring. It is not used for preserving. If you are on a reduced salt diet you can safely eliminate the salt.
It is important to use non-iodized salt though. Canning salt, cheese salt, and kosher salt are all acceptable. Redmond salt is also acceptable because it does not contain any anti-caking agents.

Fill your jars with boiling water to one inch headspace. I boil water in my tea kettle for this step.

You will need to remove air bubbles. You will need to use a non metallic spatula because metal may scratch or break your glass. I use the plastic knife that came with my Fagor canning set when I purchased it. Run the knife around the edge of the jar pressing gently on the food to release air bubbles. These air bubbles may not be visible so be sure to do this step even if you can not see any air bubbles.
Clean your jar rim and place lid on jar rim. Screw the ring on until finger tight. Do not over tighten.

Using your Duo Pressure Canner
A pressure canner does not need the water level to be over the top of the jars like water bath canning. You only need about 3” of water to use your pressure canner. If you filled your canner up more to heat up your jars, you can carefully pour some water out. Using a jar lifter, place your jars in your Duo Canner. Place the lid on top aligning the lines. Once the lines are aligned, slide the top handle over the bottom part of the handle. If the handle does not slide easily then just readjust your lid and try again.

You will need to remember to lock the lid by sliding the yellow lock towards the dial.
Pressure canning guidelines are based on total time including heating up the product and cooling down the product. To help ensure that you can for the minimum acceptable time, you should boil your jars on steam setting for 10 minutes. After 10 minutes turn the dial to 2.

When you move your dial to 2, pressure will begin building up. The yellow button will pop up indicating you have pressure. This prevents you from opening the lid when it is unsafe to. You will know the canner has reached proper pressure when it starts venting steam out of the dial. When you see steam being released from the dial, process for 40 minutes on setting 2. After your your time is done, turn the heat off and allow to cool. Pressure will drop as the temperature inside your canner naturally lowers.
You will know your Duo canner is ready to open the lid and remove jars when the yellow button lowers. Remove the jars using a jar lifter and place them on a heat safe surface such as a dry towel.

Frequently Asked Questions.
Can you pressure can a partial load?
I have never heard about this until a fellow homesteader asked me so I did some research. It is recommended on the Ball website that you process a minimum of 4 pints or 2 quarts if you are pressure canning. The USDA does not have this recommendation.
The recommendation is because it takes a shorter time for your pressure cooker to heat up and cool down if you have a smaller load. The larger loads allow for the minimum time to be reached.
It is up to your comfort level if you add jars to process. Ball always gives great advice and you will not go wrong listening to Ball. However, it isn’t a USDA recommendation.
To have a larger load you can place jars of water and use an old canning lid.
Can I expediate cooling my pressure canner by turning the dial to steam to release hot steam?
The 40 minute processing time is calculated on the TOTAL time your product is in the pressure canner, including warming up the canner to pressure and cooling down. The total time your jars will be in the canner is about an hour. You should not expediate removing the jars by using the steam setting. Simply be patient and wait for your pressure canner to lower pressure naturally.
I hope you enjoyed reading about how to pressure can peas in a Fagor or Zavor Duo pressure cooker/canner. Don’t forget to check out my other canning and preserving recipes. Thank you so much for reading.